Prerequisites:
- A Microsoft Azure account with Administrator privileges.
- Windows Admin Center 1910 or any later version using the link below.

Windows Admin Center is by far one of the best server management interfaces that Microsoft offers. You can manage Virtual Machines both On-Premises and in Azure all through the same web management interface. This post focuses on adding a new Windows Server VM to the Admin Center, so let's kick in!
Step 1
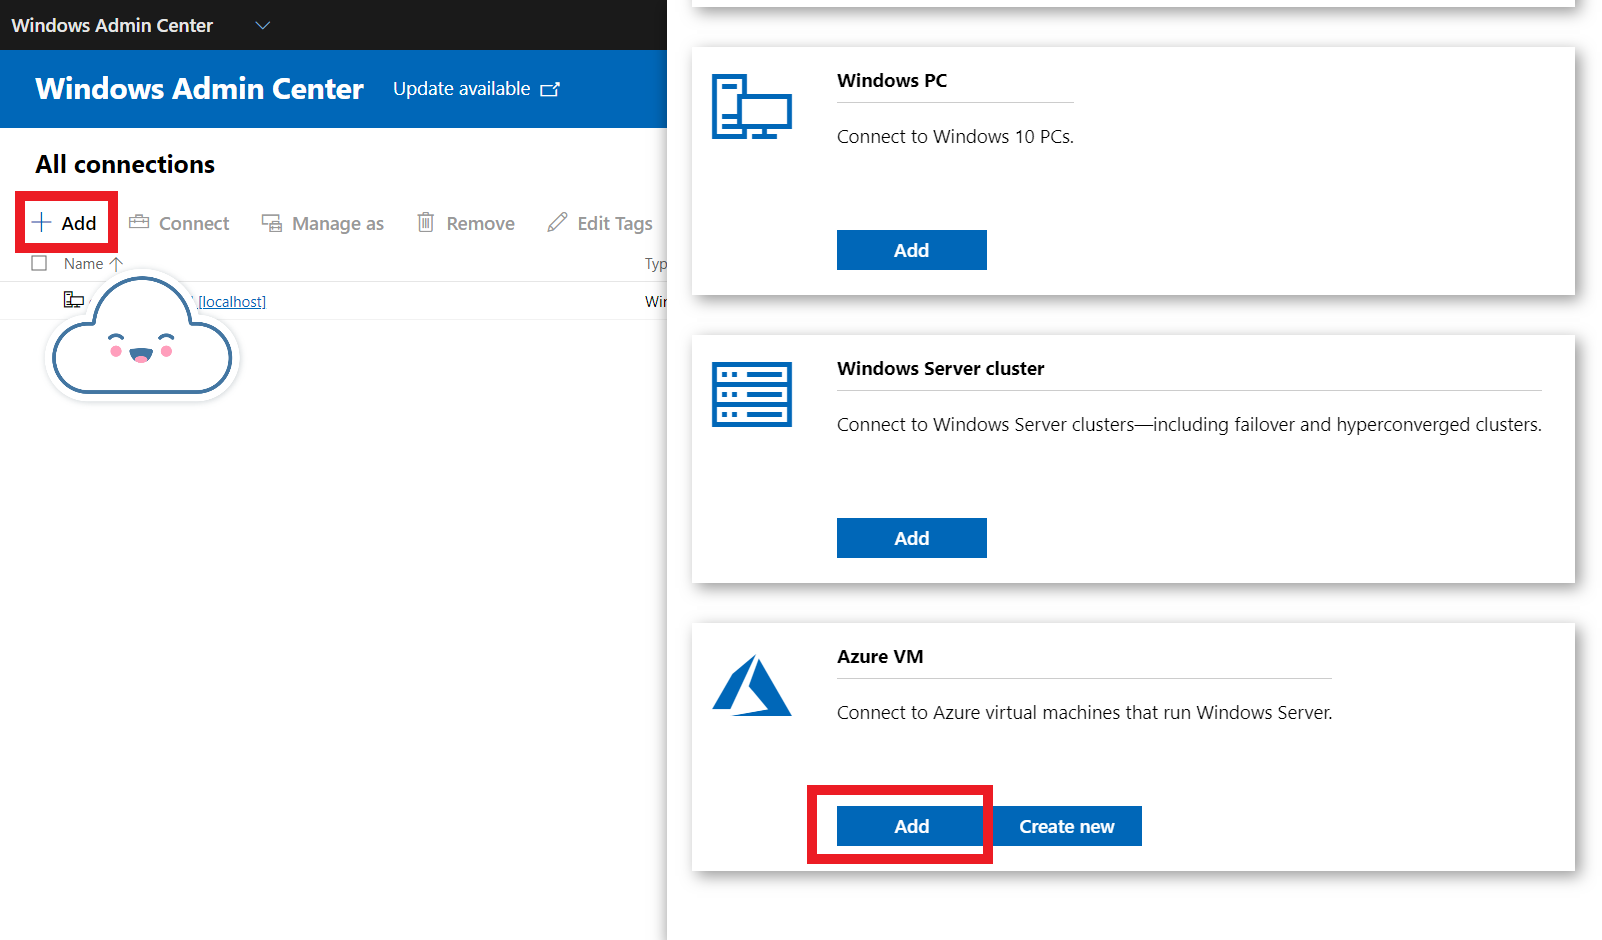
We open up Windows Admin Center, Click Add New Connection, and then select add Azure VM.
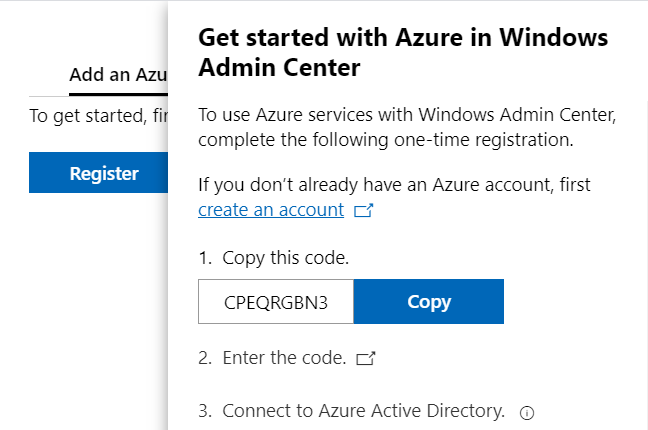
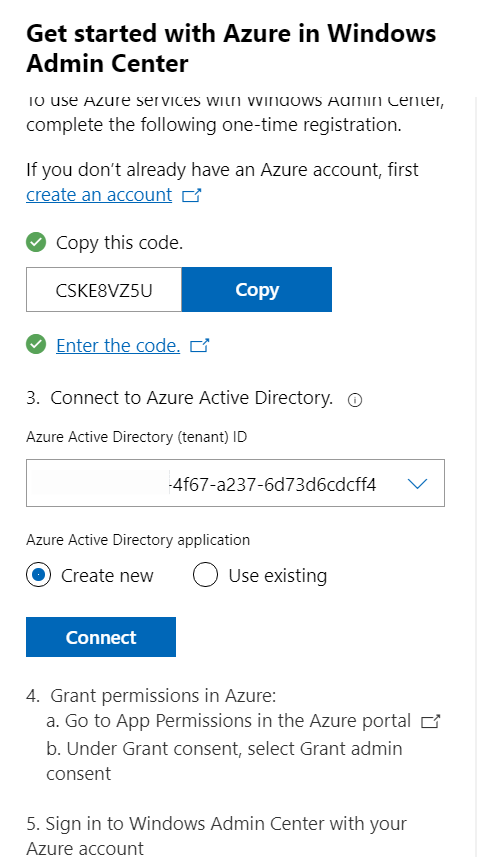
Once we have clicked add, a screen popup of register will appear, click on it and copy the code that has been generated for you, as shown below.
On the second numbered bullet above, click on the Window icon to load up the Login prompt into your Azure account. And do not close the current tab or screen.
Click Next, and you will be allowed to log in with your preferred Azure account.
Remember to use an account with Owner Permissions over your subscription.
We then return to our previous tab, as shown below. Azure will automatically populate your active directory tenant ID, or you should select the appropriate tenant id if you have multiple tenants.
Step 2
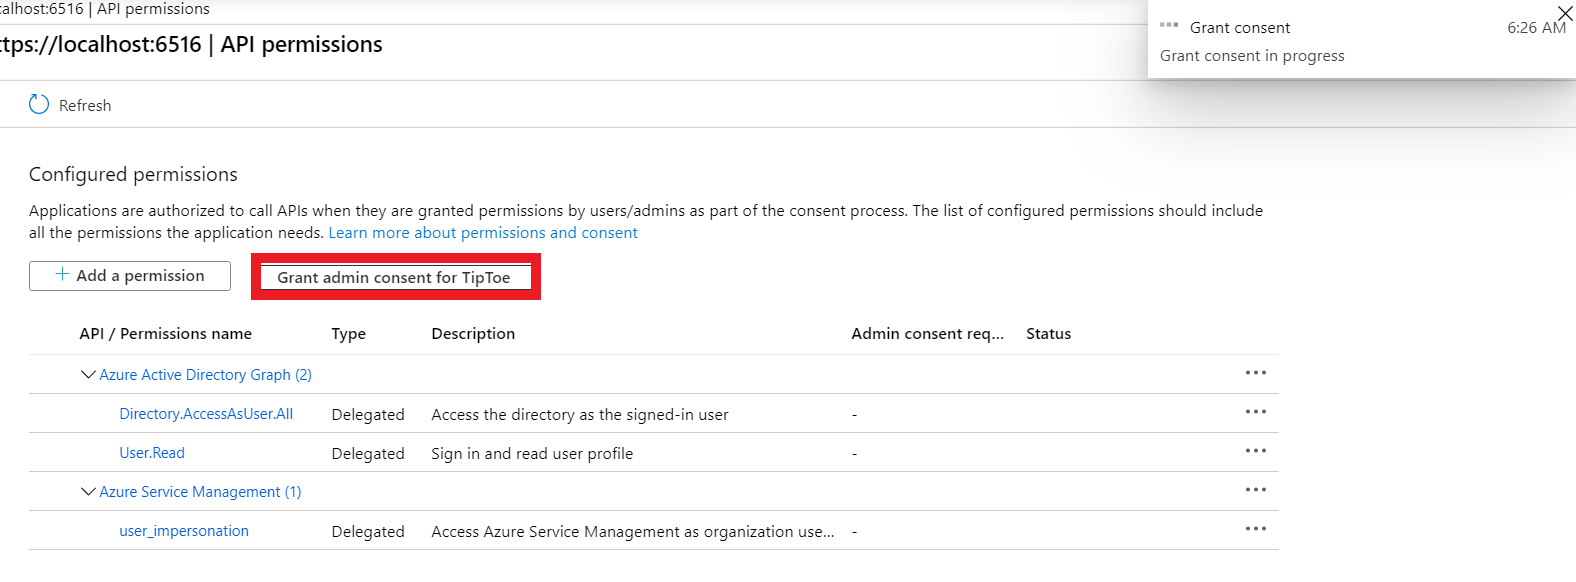
Then Click connect, and load the link. Go to App Permissions in the Azure Portal. The beauty of this is that it will take you directly to Azure Active Directory Application registrations. You will have to grant admin consent for Windows Admin Center in Azure for your tenant.
When that is done, we return to Add an Azure VM, and we will receive a login prompt with our Azure credentials.
We then add the VM that we want to manage. Make sure to add the Public IP address unless you have a virtual network gateway for your environment, that's when you can use the Private IP address.
Step 3
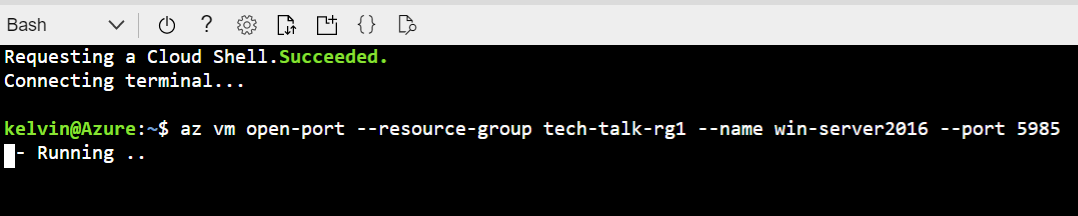
When that's added, the final step is to enable remote connections on our Azure VM.
On our Azure VM, we run the commands below to enable WinRM to manage our machine remotely.
In CMD:
winrm qcOR Using PowerShell as shown below:
Get-Item WSMan:\localhost\Client\TrustedHosts

winrm  set  winrm/config/client '@{TrustedHosts="*"}'
Next, we create a new Inbound network security group rule that adds port 5985, which Windows Admin Center uses to manage a machine over HTTPS
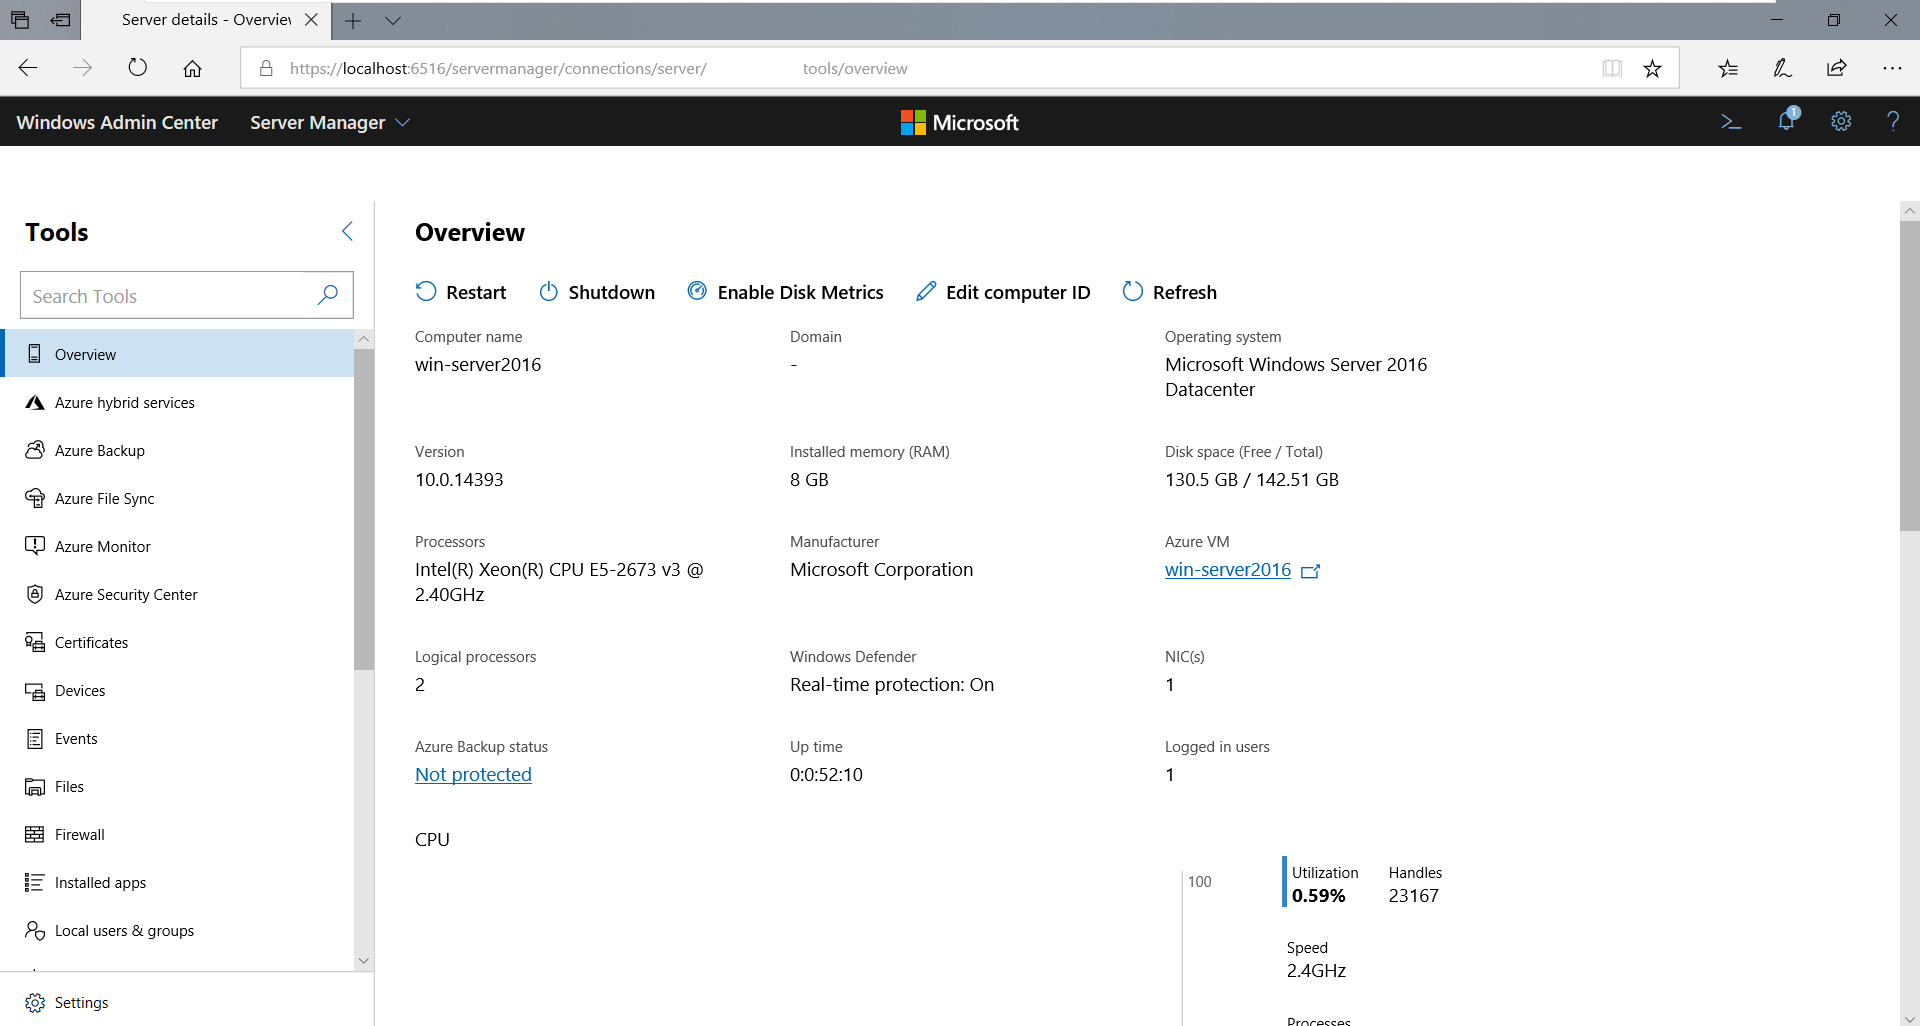
Next, we go back to Windows Admin Center and sign in with the Virtual Machines credentials, and then we should be able to manage our VM.